


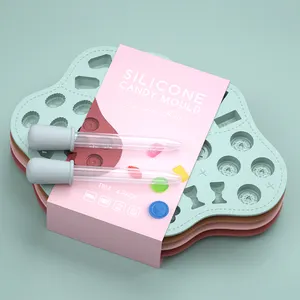
P1277 Eco-Friendly Silicone Cross Shape Mold For Epoxy Resin Craft Keychain Mold Jewelry Pendant Tool
Ready to Ship
$0.40
Min Order: 20 pieces
Shipping per piece: $0.97


Candle molds are specifically intended to shape and form candles during the cooling and solidification stages. These molds are available in various materials, forms, and sizes, giving candle crafters numerous options for creating candles with distinct appearances and qualities.
Silicone candle molds are popular for their flexibility, durability, and precision. Crafters like its ease of use and ability to replicate complex forms and designs accurately. With their straight sides and robust structure, pillar candle molds are great for creating classic and timeless candles. These molds come in a variety of sizes, allowing craftspeople to make everything from small votives to giant statement pillars. Taper candle molds replicate the distinctive shape of taper candles, allowing artisans to experiment with different colors and textures. Taper candle molds are ideal for creating formal table settings or adding a sense of elegance to any room. Beeswax candle molds enable craftspeople to manufacture candles with the distinct properties of beeswax, such as a warm honey fragrance and a subtle, golden tint.
Those seeking individuality in their candle designs can explore unique candle molds. These molds come in diverse shapes and sizes, ranging from animals and plants to abstract forms. Custom candle molds provide the ultimate level of personalization for candle makers. Crafters can collaborate with mold makers to bring their designs to fruition, ensuring that each candle reflects their style and imagination. To add a touch of nostalgia to candle making, antique candle molds are the answer. These molds, often made of metal or other durable materials, reflect the craftsmanship of bygone eras. To get the perfect spooky feeling for Halloween, Halloween Candle Molds are an excellent choice. These molds allow candle makers to craft candles that add a festive touch to autumn decor.
Choose a candle mold that corresponds to the shape and size of the candle to be produced. To ensure a smooth and successful candle-making procedure, thoroughly prepare the mold before pouring the wax into it. Clean the mold well with soap and water to get rid of any dust, debris, or residue from prior uses. Before proceeding, ensure that the mold is totally dry. If the candle mold requires a wick, cut it to the appropriate length, leaving a few inches of surplus at the top. Use a wick holder, tab, or adhesive to secure the wick to the mold's bottom center. To guarantee an equal burn, center the candle and keep it straight. Melt the candle wax in a double boiler or wax melting pot until it reaches the proper temperature for the type of wax being used. Add any desired aroma oils, colors, or additions to the heated wax and gently mix to incorporate.
Carefully pour the molten wax into the candle mold, filling it to the appropriate level. Avoid overfilling the mold, as extra wax may run out or produce uneven burning. If necessary, use a funnel or pour spout to restrict the flow of wax and avoid spills. Allow the wax to cool and solidify completely inside the mold before removing the candle. Depending on the size and type of candle, this process could take several hours or even overnight. To avoid deformities or surface flaws, do not move or disturb the mold while the wax is still liquid. After the wax has completely cooled and set, carefully remove the candle from the mold. To free the candle, gently bend or tap the mold, then slowly and carefully pull the edges of the mold away from it. If required, use a blunt instrument or knife to loosen tough places. Trim any excess wick from the top of the candle to the desired length, leaving about 1/4 to 1/2 inch above the candle's surface. This ensures a clean and even burn when the candle is lit.


 浙公网安备 33010002000092号
 浙B2-20120091-4